
When you start your journey to establish a successful online store, one of the most pivotal steps is setting up a smooth and secure payment process. In this guide, we’ll walk you through the intricacies of configuring payment gateways on your Shopify store, leaving no stone unturned to ensure a smooth and hassle-free checkout experience for your valued customers.
Understanding Payment Gateways
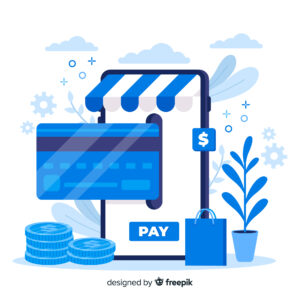
Payment gateways are like the vital bridges that securely move money from your customers to your merchant account. In Shopify, you’ll find a variety of integrated payment gateways, each with its own features and benefits. But before we dive into the step-by-step setup, let’s take a closer look at each stage involved in creating the perfect payment gateway setup.
Understanding these stages will help you choose the right payment gateway for your Shopify store and ensure a smooth, secure payment experience for your customers. So, let’s explore each phase in detail to make informed decisions and set up a payment gateway that suits your business needs.
Step 1: Accessing Payment Settings
Think of your Shopify admin dashboard as your control hub for your online store. To reach your payment settings, simply go to the “Settings” section. Here, you’ll establish the groundwork for your payment setup, ensuring a smooth payment experience for your customers.
Step 2: Choosing a Payment Gateway
While you’re on the journey of exploring different payment gateways, take some time to weigh the specific benefits each one brings. Consider aspects like transaction fees, geographic reach, and how well they match your business model. This is your opportunity to pick the gateway that aligns perfectly with your business, ensuring secure transactions right from the start.
Step 3: Configuring Payment Gateway
The first step involves entering your business and banking details. Verification ensures that your business and bank account are fully prepared for the exciting journey ahead. If you’ve chosen a third-party gateway, it’s about using the credentials they’ve given you, establishing a connection that paves the way for digital transactions.
Step 4: Testing Transactions: The Rehearsal
Before the grand reveal, it’s time to rehearse your transactions. Seek out the sanctuary of sandbox environments, available with some gateways, where you can simulate transactions with precision. This step ensures you’re well-prepared for the main event.
Step 5: Enable Additional Payment Methods
To accommodate various payment preferences, it’s wise to offer a variety of payment options. Provide your customers with choices that match their preferences, including credit cards, digital wallets, and the interesting world of buy now, pay later services. This step ensures that you’re meeting the needs of a wide range of customers, enhancing their shopping experience.
Step 6: Customize Checkout Experience: Weaving Brand Identity
Make sure the checkout environment reflects your store’s design and identity. Add your brand’s colors, logo, and images, creating a visual representation that strongly connects with your customers. This step turns the checkout process into a branded experience that helps build a deeper connection with your patrons.
Step 7: Addressing Security and Compliance: Safeguarding the Experience
In the midst of numerous transactions, security should always remain a top priority. The requirement for Payment Card Industry Data Security Standard (PCI DSS) compliance is like a crucial performance that safeguards data integrity and ensures customer trust. This step highlights the significance of data security and compliance in fostering trust with your customers.
Step 8: Set up Taxes and Shipping: Navigating Legal Waters
As your business journey continues, it’s important to make a necessary stop to address taxation and shipping. Set up your tax settings to match your business’s geographic presence and legal requirements. Dive into the world of shipping rates, ensuring that your customers see clear and accurate pricing for their chosen delivery locations. This step handles both legal and logistical matters, ultimately ensuring a seamless experience for your customers.
Step 9: Launch and Monitor
Now that everything is in place, the lights dim, and your payment gateway setup is ready for its big debut. It’s essential to closely watch the proceedings, keep an eye on transactions, and promptly address any issues or questions that may come up. You become the dedicated protector of the checkout experience, making sure it runs smoothly and without a hitch.
Conclusion
Think of your payment gateway as the first step in your customers’ journey. By using the steps outlined in this guide, you’re not only establishing a payment system but also crafting a smooth payment experience that matches your brand. Your customers, like an enthusiastic audience, will value your meticulousness, dedication to security, and strive for perfection. As your e-commerce business shines, remember that it’s the sum of every little detail that leads to a successful and enjoyable experience.